Category: Travel Tips

  • How to Get Around Jeju Island (Bus, Taxi & Rental Car Guide)

    If you’re planning to visit Jeju Island on your trip to South Korea, then one of your leading questions might be exactly how to get around the island. Luckily, public transportation in Jeju, and the rest of Korea, is very straightforward and quite easy to use with the help of local apps. Generally speaking, you have 3 options when visiting Jeju – the public bus system, KakaoT (Korea’s “Uber”), and private cars or tours.

    My Essential Korea Travel Resources :

    There are plenty of travel companies out there, but these are my favorite websites and resources for planning an unforgettable trip to South Korea. This post may contain affiliate links, which means I may earn a small commission at no extra cost to you. Learn more here.

    🚙 Car rentals, although not common in Korea, are best through Discover Cars – just make sure to have a copy of your international driver’s permit with you!

    🏨 I always use AGODA to compare hotels & prices in Asia.

    📶 To keep cell phone service, I use Airalo’s easy to purchase eSIM’s (no installation required).

    📸 For fun things to do, Klook specializes on tours in Asia, otherwise Viator also does the trick.

    🦋 Just in case, Safetywing is the insurance I always use when visiting a new country.

    🧳 Lastly, my essential packing list when visiting Korea.

    What to Expect When Visiting Jeju Island

    Jeju Island is the hidden oasis of South Korea, and is often referred to as the Hawaii of Asia. If you’re lucky enough to spend a few days here, then luckily there’s plenty to do on the island, even if you’re just visiting on a cruise port day.

    If you’ve spent the rest of your time in Korea on the mainland near Seoul, then you can expect a much quieter pace of life, views of the horizon and coastlines, and delicious unique foods like Jeju’s famous “black pork.” If this is your first time on Jejudo, or if you’re porting for the day via a cruise, then here’s a short list of a few things you won’t want to miss :

    ​Hello Kitty Island – Another unique option for anyone who loves Sanrio and Hello Kitty. Although it’s geared toward younger visitors, this interactive museum has a fun cafe inside where you can order Hello Kitty themed drinks and foods.

    The Coastline – Jeju’s coastlines are often compared to Hawaii’s, there’s plenty of short hikes that’ll lead you to some incredible views!

    The Waterfalls – Especially if you’re visiting the South of the island, there’s plenty of waterfalls that are just a short hike, my personal favorites are the Cheonjiyeon Waterfalls and Sojeongbang Waterfall!

    Jeju Stone Park – A local museum with incredible insight into Korea’s traditional stories and lore. Here, you can learn all about the Dol Hareubang you’ll see spotted all around the island

    Jeju “Black Pork” – A unique option for trying Korean BBQ, this pork isn’t actually black. It’s simply named for the type of pig – Jeju Black Pigs.

    Getting Around on Jeju Island

    There are 3 main ways to get around Jejudo, or Jeju Island – all of them are fairly straightforward.

    Tourist Buses – Since I last visited, Jeju has also implemented Tourist Buses. An easy way to navigate different areas of the island with different routes that go towards the east and to the west. If you get a day pass, you can hop on and off and they conveniently stop at most major attractions on the island. However, it’s worth noting that the narrated tour is only in Korea, but they have TV’s onboard that highlight each next stop in Korean and English.

    Public Bus System – In order to take the public bus, you can either use your credit/debit card to tap on and off each time you ride the bus, or you can purchase a T-Money Card or Bee Card at pretty much any local convenience store. You can then use these pre-loaded cards on any public transportation in South Korea – so if you purchased one in Seoul it will also work in Jeju! Because the buses only stop at so many places, this is the most difficult to plan ahead for specific stops – luckily most major attractions on Jeju have a bus stop within walking distance. If you’re traveling with a group, you can also let the bus driver know how many are in your group before you tap your card to get onto the bus! Kakao Map and Naver Maps are excellent apps to download on your phone to see the exact bus schedules and routes.​

    KakaoT – As long as you have downloaded the KakaoT app and created an account, you can easily order a Kakao Taxi and pay through either cash, credit/debit card, or your T-Money Card. These “KakaoT” cards work just like Uber. (Note, there is no Uber in Korea.)

    Private Car – If you’re only visiting for a short time, you might want to just book a private tour! This way you can avoid any hassle of getting around the island. There are plenty you can find on Viator that offer full day tours around Jeju. On the other hand, if you have a few days on the island, the easiest option might just be to rent your own car! You’ll need your International Drivers Permit, and parking might be difficult in the large cities – but at most attractions on Jeju there’s plenty of parking for visitors.

  • Seoul to Busan by KTX: Everything You Need to Know

    If you’re into zombie movies, or movies about Korea, then you’ve mostly likely heard of the 2016 film, Train to Busan. A story about a father and his young daughter that become stuck on the train ride to Busan while a zombie outbreak occurs. The best part is that you can now experience the real train to Busan for yourself during your visit to Korea!

    My Essential Korea Travel Resources :

    There are plenty of travel companies out there, but these are my favorite websites and resources for planning an unforgettable trip to South Korea. This post may contain affiliate links, which means I may earn a small commission at no extra cost to you. Learn more here.

    🚙 Car rentals, although not common in Korea, are best through Discover Cars – just make sure to have a copy of your international driver’s permit with you!

    🏨 I always use AGODA to compare hotels & prices in Asia.

    📶 To keep cell phone service, I use Airalo’s easy to purchase eSIM’s (no installation required).

    📸 For fun things to do, Klook specializes on tours in Asia, otherwise Viator also does the trick.

    🦋 Just in case, Safetywing is the insurance I always use when visiting a new country.

    🧳 Lastly, my essential packing list when visiting Korea.

    Booking Your Ticket on KTX

    Luckily, booking your Train to Busan ticket is very easy on RailNinja – the only platform I use to book my train travel in Korea. There are three main options for train routes from Seoul to Busan :

    • Bullet/High Speed Train – about $85 a person, and about 2.5 hours
    • Express Train – about $65 a person, and about 4.5 hours
    • Intercity Train – about $45 a person, and about 5.5 hours

    The train you choose really depends on your budget and how much time you want to spend on the train. It’s also important to note which station you’re leaving from, there are two options in Seoul. The Seoul Central Station is very easily accessible, and is where I left from, but you can also leave from Suseo Station in the heart of Gangnam. Lastly, there are two types of tickets on the KTX Train – basic economy seats and first class seats. The economy seats are blue and have 2 in each row, first class seats are red and have single seats in each row.

    Experiencing the Train to Busan

    If you’re a fan of the Train to Busan, then you’ll be pleased to know that the trains have free Wifi, and the entire Train to Busan movie is free on Youtube! And since the movie is just under 2 hours, you’ll be able to stream the entire movie on your trip! Although to be honest, it was a bit eerie sitting in the same seats and train cars shown in the movie.

    I also recommend bringing snacks and drinks for your ride. You’ll find some people bringing complete meals (fairly common for locals), but I would stick to something easy like fruits or pre-packaged snacks and drinks! Up above your seat you can also find a place to store your luggage, and because the seats are fairly wide, you’ll have enough room around you as well to stay comfortable. The bathrooms were also clean and well stocked.

  • Seoul Subway Guide for First Time Visitors

    Seoul Subway Guide for First Time Visitors

    With 23 lines and over 760 subway stations, the subway system in Seoul can be confusing, overwhelming, and stressful if you don’t know what you’re doing, or if it’s your first time. Having introduced my husband to his first subway ride in Seoul (he’s now a pro) and even his family, I’m convinced my guide is all you need to successfully ride the subway in Seoul.

    My Essential Korea Travel Resources :

    There are plenty of travel companies out there, but these are my favorite websites and resources for planning an unforgettable trip to South Korea. This post may contain affiliate links, which means I may earn a small commission at no extra cost to you. Learn more here.

    🚙 Car rentals, although not common in Korea, are best through Discover Cars – just make sure to have a copy of your international driver’s permit with you!

    🏨 I always use AGODA to compare hotels & prices in Asia.

    📶 To keep cell phone service, I use Airalo’s easy to purchase eSIM’s (no installation required).

    📸 For fun things to do, Klook specializes on tours in Asia, otherwise Viator also does the trick.

    🦋 Just in case, Safetywing is the insurance I always use when visiting a new country.

    🧳 Lastly, my essential packing list when visiting Korea.

    Basic Subway Etiquette in Seoul

    There are a few main things to know before you ride the subway in Seoul for the first time. The first is to make sure you have a ticket (I’ll go over those steps below). Occasionally, especially during peak rush hour, there will be workers in yellow vests waiting outside the entrance/exits to the subway to make sure you’re properly and responsibly using the subway. The second is that the subway system in Seoul runs from about 5:30 am to midnight – this can vary a little and typically in the early morning and late night subways will come a little less frequently.

    The third thing to keep in mind is that the subway in Korea is very organized and orderly. This means staying in line at each door while waiting for the next train, and allowing people to fully get off the train before getting on. No matter how busy it gets, people in Korea don’t budge in line and don’t push to get on first – it’s considered quite rude if you do either. The fourth thing to remember is that most people on the subway won’t talk, or try to talk very quietly. Make sure to use headphones if you’re listening to music, and to be aware of your voice level. The very last thing to remember before using the subway in Seoul is that in Korea people are very respectful of elders. Not only are there special seats for them, but even if you have a seat and see an elderly person standing, it’s expected that you give up your seat for them if you’re younger. In addition to special seats for the elderly, there are also special seats for pregnant people and you’ll also find people often give up seats to young children and sometimes foreigners.

    Step by Step Guide to the Seoul Subway System

    Below, I’ve outlined my step by step approach to using the subway system in Seoul for the first time :
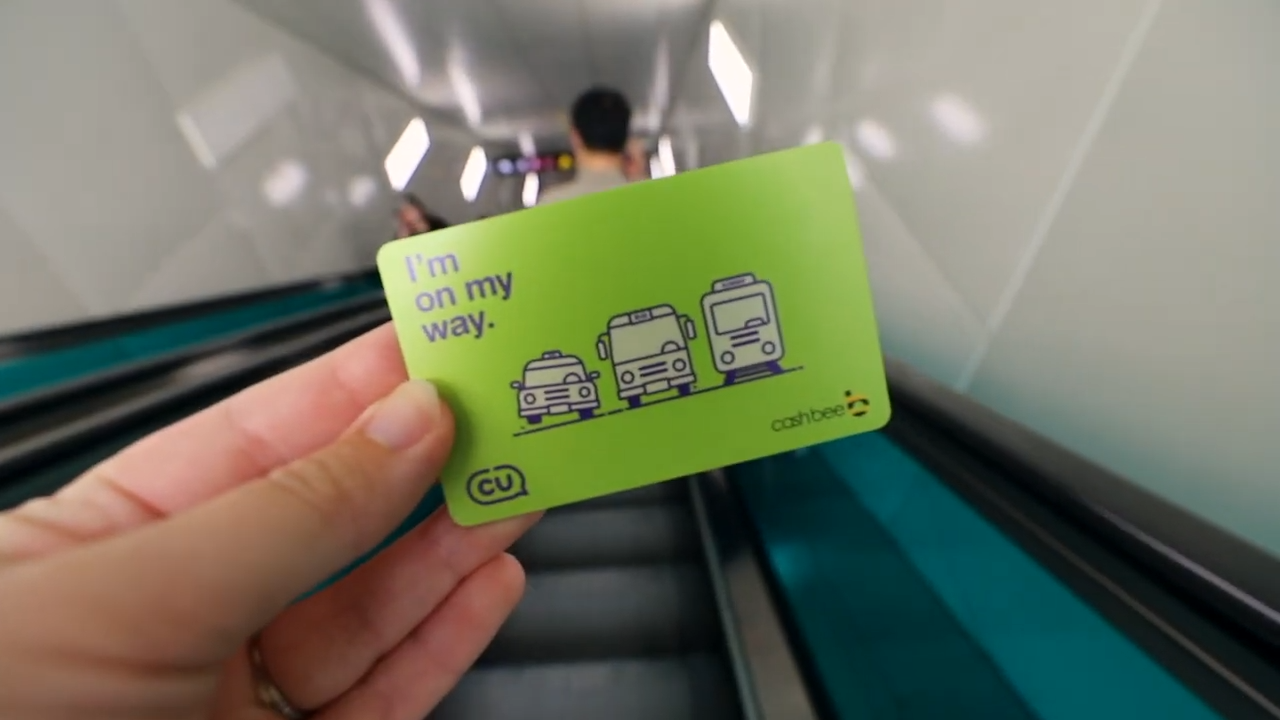
    ​1. Getting a Ticket : There are multiple ways to get a ticket, but my personal favorite is to just purchase a “Bee Card” or “Cash Bee Card” from any CU or GS25 Convenience Stores. These work like a pre-loaded debit card, but specifically for public transportation in Korea – they even work on Jeju Island! Once you get your card, at every subway station there will be machines that you can reload your card with if you get low, and machines work in English too (just change the language at the bottom of the screen). The most important thing is to keep your card on the tray until it’s completely done reloading. I would recommend starting with about ₩20,000 for a week’s worth of travel if you’re staying in Seoul, and you can always reload if you need more.
    If you don’t want to get a Bee Card, you can also get a “T-Money Card” which works the same way, or purchase individual tickets from the same reloading machines in the subway. Usually, these individual tickets require a ₩500 deposit that is refunded at the end of your ride.

    2. Download your Maps : The best apps I’ve found for public transportation in Korea is Naver. You can put in your final destination, and it’ll give you all best ways to get there, whether that’s walking, using the bus, or using the subway. I typically choose the “subway” button and it’ll give me directions only using the subway. The app tells you when the next train is expected, how many stops are in between and the stop names, where to transfer (if required), and exactly where to get off. The app will even notify you when your stop is getting close so you don’t miss it!
    ​3. Finding the Subway & Getting On, Then Off : Most subway stations in Seoul will have a sign marking the subway, and a large majority of them are underground. Almost all stations have 4 entrances, and if you need a handicapped entrance most stations will also have an elevator to get down to the tracks. Otherwise, there will either be stairs or escalators – on the escalators, it’s expected that you stand on the right and keep the left clear for people who want to walk up or down. Once you get inside, you’ll have to scan your ticket or card to get through the gates. After you scan it, the gate will beep and let you through, and on the little screen you’ll also see your remaining balance if you have a reloadable card. You can then follow the signs to the platform you need, just make sure you catch the train that’s going the right direction! All doors onto the subway are automatic, so they will automatically open and close. Once you make it to your stop and are ready to exit, you’ll have to once again scan your card to exit the subway.
    Congrats! You’ve just completed all steps necessary to ride the subway in Seoul! 🙂

  • Is Air Premia Worth It? My Honest Review Flying from Los Angeles to Seoul

    Is Air Premia Worth It? My Honest Review Flying from Los Angeles to Seoul

    If you’re planning a trip to South Korea, you’ve probably come across Air Premia while searching for flights. That was exactly my husband and I’s experience, we genuinely had never heard of them before we booked our flight. On our most recent trip to Seoul, we found a direct flight from Los Angeles (LAX) to Seoul that was significantly cheaper than any of the other airlines. After doing a quick bit of research, we decided to give it a go. After flying more than 100 flights over the past two years, here’s my honest review of what it was actually like flying Air Premia from LAX to Incheon, Seoul.

    My Essential Korea Travel Resources :

    There are plenty of travel companies out there, but these are my favorite websites and resources for planning an unforgettable trip to South Korea. This post may contain affiliate links, which means I may earn a small commission at no extra cost to you. Learn more here.

    🚙 Car rentals, although not common in Korea, are best through Discover Cars – just make sure to have a copy of your international driver’s permit with you!

    🏨 I always use AGODA to compare hotels & prices in Asia.

    📶 To keep cell phone service, I use Airalo’s easy to purchase eSIM’s (no installation required).

    📸 For fun things to do, Klook specializes on tours in Asia, otherwise Viator also does the trick.

    🦋 Just in case, Safetywing is the insurance I always use when visiting a new country.

    🧳 Lastly, my essential packing list when visiting Korea.

    What to Expect When Flying Air Premia

    Because this was my first time flying Air Premia, I really had no idea what to expect, and after flying budget airlines in the past my expectations were pretty low. However, Air Premia simply went above and beyond in every way, even on their website they actually categorize themselves as a “hybrid” airline – meaning they rival budget airline price points while still offering a more inclusive and complementary air service.​ Even though my husband and I flew in economy seats, this was honestly one of the best flight experiences we’ve had, and as two people that have taken lots of flights last two years, that’s saying something.

    Our check in experience at LAX was the same as other airlines, we went to the check-in counter and checked in our two included bags each and we had an on-time departure – which lately isn’t often the case. We were also allowed a carry on bag, which fit in the space above us, and we were able to stretch out and utilize the space under the seat in front of us. We each brought a backpack, which had no issues for space. When we arrived at our seat we had a pillow and blankets, plus an eye mask for us to use during the 13 hour flight. Seats had a surprising amount of legroom, even my husband who is 6’2″ had much more space than other budget airlines. Similar to other airlines, each seat had its own pocket for personal items, a TV to watch shows, and a charging port. Wifi was available for purchase, but we didn’t buy it.

    My Honest Air Premia Review

    Boarding, Seats and Overall Comfort

    The boarding experience for our Air Premia flight felt organized, and very efficient. Similar to other airlines we boarded in zones. Priority passengers (like those in first class) boarded first, and those of us in economy boarded in steps through our assigned zones. Flight stewardess and attendants were in uniform and cleanly dressed, reminding me of Korean Air, and they kindly welcomed us onto the plane as we boarded. Similarly, the plane itself was very clean, there was no garbage on the floor and everything seemed to be in its place. Even the tray tables seemed to have all been wiped down. Compared to my prior experience with flights in the same price range, I was very impressed. Like I mentioned above, we had enough space to store our carry on above us, and we also had plenty of legroom for my tall husband to stretch out. We also had blankets, pillows, and eye masks to use during the flight.

    Entertainment

    Entertainment was a bit tricky as well. Because they’re a Korean based airline, most of the onboard entertainment was in Korean as well, which really limited options for English speakers like my husband. Luckily I had no issues, and unlike experiences on other flights, our screens worked the entire time and we had no issues. If you’re planning to fly Air Premia and don’t speak Korean, I recommend pre-downloading some episodes or movies to enjoy during the flight.

    Food & Drinks

    During our flight to Seoul, we were served two different meals and a snack, as well as various beverages like coffee, tea, and soda. There were more options available for purchase (like their “chi-mek” combo – a chicken & beer combo famous in Korea), but we only tried what was included with our ticket. Overall, the food was ok – you could tell they tried to incorporate a mix of Korean and American food, some of it worked and some didn’t. Their version of bibimbap was ok, but as you can tell in the photo some of the vegetables were a bit old. It did come with a miniature version of sesame oil and gojuchang, which I thought turned out pretty good after mixing in. On the other hand, their cold coleslaw side with a slice of ham really didn’t do it for me – but with so much food included I really couldn’t complain.

    Would I Fly Air Premia Again?

    Overall, I honestly enjoyed flying Air Premia and it definitely exceeded my expectations. The service felt much closer to a full service airline than a budget airline – boarding was organized, the cabin was clean, and having multiple meals included really made the long flight much more comfortable. While the entertainment options could be better for English speakers, I would absolutely fly Air Premia again. If you’re looking for an affordable nonstop flight between Los Angeles and Seoul, I think Air Premia is definitely worth considering.

  • Driving in South Korea as a Foreigner: Everything You Need to Know

    Driving in South Korea as a Foreigner: Everything You Need to Know

    Renting a car is one of the best ways to explore more rural areas of South Korea that are difficult to reach by public transportation, especially places like Jeju Island, national parks, and smaller coastal towns. Even though driving in Korea is surprisingly similar to driving in the United States, there are a few important differences you’ll want to know (and paperwork you’ll want to have) before getting behind the wheel and beginning your adventure. Beginning with getting your International Driving Permit, you’ll also want to understand the toll roads, tips on tight parking, and which navigation apps apps to use.

    My Essential Korea Travel Resources :

    There are plenty of travel companies out there, but these are my favorite websites and resources for planning an unforgettable trip to South Korea. This post may contain affiliate links, which means I may earn a small commission at no extra cost to you. Learn more here.

    🚙 Car rentals, although not common in Korea, are best through Discover Cars – just make sure to have a copy of your international driver’s permit with you!

    🏨 I always use AGODA to compare hotels & prices in Asia.

    📶 To keep cell phone service, I use Airalo’s easy to purchase eSIM’s (no installation required).

    📸 For fun things to do, Klook specializes on tours in Asia, otherwise Viator also does the trick.

    🦋 Just in case, Safetywing is the insurance I always use when visiting a new country.

    🧳 Lastly, my essential packing list when visiting Korea.

    Planning to Drive in South Korea

    The most important thing to have before you begin driving through Korea is your IDP, or your International Driving Permit. These are pretty easy to get if you have a driver’s license in the US, all you need to do is stop by a AAA office, pay the $20 fee, and they’ll issue your IDP right there. My husband Tyler has done this the last few times we’ve visited Korea, and the entire process is super simple, easy, and quick – and really only takes about 10 minutes.

    When you go to pick up your rental car in Korea, you’ll typically need your passport, original driver’s license from the country you’re visiting from, your International Driving Permit, and a credit card for the rental. Depending on the company, you might also have the option to add additional insurance onto the rental for extra peace of mind.

    Before deciding to rent a car, it’s worth planning out where you’ll actually be traveling. Personally, I don’t recommend renting a car if you’re planning to stay in larger cities like Seoul, Busan, or Incheon. Public transportation is everywhere in these cities, super easy to use, and honestly traffic in these cities can last forever and be very overwhelming, with very limited parking. However, if you’re planning to visit places like Jeju Island, Seoraksan National Park, the East Coast or Korea, or some of Korea’s smaller cities and rural areas, renting a car makes exploring much easier.

    It’s also worth noting that South Korea is a country with toll roads. Depending on your rental car, it may come with a Hi-Pass, which allows you to drive straight through open toll lanes without stopping. This is the easiest option. Otherwise, you’ll need to grab a ticket when entering the highway at the toll booth and pay when you exit, with the price depending on how far you’ve driven from where you grabbed your ticket. Most toll booths now accept credit cards, or cash, but it’s always worth it to ask your rental company about a Hi-Pass card beforehand. If for some reason you get stuck at a toll booth, there’s usually a “help” button you can press that will call someone out to come help you.

    My last tip before you start driving in Korea is that you shouldn’t rely on Google Maps for driving directions. Instead, you’ll want to download either NAVER Maps or Kakao Map before your trip. Both apps have much more accurate directions and are what locals use for everyday navigation.

    What It’s Actually Like Driving in South Korea

    Like I mentioned earlier, driving in South Korea is actually pretty similar to driving in the United States – with a few major differences. Unlike the US, there are cameras everywhere in Korea, space in Korea is also extremely limited and usually results in smaller cars, narrow driving lanes, and extemely tight parking spaces. Unless you’re confident in your parking skills, I would avoid driving around Seoul altogether. If you get stuck in traffic you could be there for hours, so you’ll save a lot of time just by using public transportation like buses and subways. Outside of Seoul, the roads are a lot easier to navigate, and having a car is one of the easiest ways to explore more places that are off the beaten track.

    One thing that surprises most visitors is how strict Korea is with traffic enforcement, like speeding and not following traffic rules. If you’ve visited Korea before, you’ve probably noticed cameras everywhere in public (hello CCTV), and the same goes for on the roads. Because of this I highly encourage you to follow the speed limit and traffic laws – if you don’t there’s a pretty good chance your rental company will get a photo and bill charged to them, and they’ll simply forward the charge to you or fine the credit card you had on file for your reservation.

    Road signs in Korea are very similar to the United States, and usually you can somewhat guess what they mean based on the graphic. Most signs have the direction and location you’re heading towards in both Korean and English, although you’ll find that names in English can be pretty long and difficult to read while driving. Thankfully, as long as you have NAVER or KakaoMaps downloaded you should be fine. One of my favorite things about driving in Korea is that maps and directions will often tell you to follow a colored line, like the blue or pink line (which is literally painted on the road) and you can follow it to whichever exit you need. You’ll also see those same colored lines on overhead road signs, which makes it really easy to stay in the correct lane when you’re not sure where to go.

    One thing I’ve never seen in other countries is Korea’s focus on preventing sleepy driving. Even though Korea is small and you can drive the entire country in just a few hours, there are many unique features that have been put in place to help drivers stay alert. Korea’s highway rest stops are honestly some of my favorite parts of any road trip. Unlike in the US, they have clean bathrooms, large food courts, cafes (including robots that will make your coffee), convenience stores, stores to shop at, and sometimes even small parks and observation decks where you can stretch your legs.

    The other features to prevent sleepy driving are a little more entertaining. As you drive throughout Korea, you’ll sometimes notice fake construction workers and fake flashing police lights that are designed to grab your attention to keep you alert. If you find yourself driving through a long tunnel or across a large bridge in Korea, you might also hear music or fake conversations that are played through speakers. Some even have coloful lights and designs to keep drivers awake. It definitely takes some getting used to when you’re driving in Korea, but considering Korea is known for having one of the most sleep-deprived populations in the world, it actually makes a lot of sense.

    Overall, I think driving in South Korea is much easier than many people think! As long as you have an International Driving Permit, use NAVER Maps or Kakao Map for navigation, and avoid driving through central Seoul or other major cities, you’ll probably have a great experience!

  • How to Rent an LG U+ Pocket WiFi (WiFi Egg) in South Korea

    How to Rent an LG U+ Pocket WiFi (WiFi Egg) in South Korea

    Staying connected while traveling in South Korea is easier than its ever been, but with so many options available for visitors, sometimes it can be difficult to decide which option is the right for you and your travel style.

    You could keep your fingers crossed and rely on free city WiFi (make sure to have a VPN if you do), purchase an eSIM for the few days you’re there, pay for international roaming on your own device through your own carrier, or rent a Pocket WiFi (also called a WiFi Egg).

    I’ve personally used all four options on different trips throughout the years, and renting a Pocket WiFi recently ended up being my favorite option – and the one option I recommend the most for travelers looking to go on multiple day trips out of Seoul or explore more “off the beaten path” attractions.

    My Essential Korea Travel Resources :

    There are plenty of travel companies out there, but these are my favorite websites and resources for planning an unforgettable trip to South Korea. This post may contain affiliate links, which means I may earn a small commission at no extra cost to you. Learn more here.

    🚙 Car rentals, although not common in Korea, are best through Discover Cars – just make sure to have a copy of your international driver’s permit with you!

    🏨 I always use AGODA to compare hotels & prices in Asia.

    📶 To keep cell phone service, I use Airalo’s easy to purchase eSIM’s (no installation required).

    📸 For fun things to do, Klook specializes on tours in Asia, otherwise Viator also does the trick.

    🦋 Just in case, Safetywing is the insurance I always use when visiting a new country.

    🧳 Lastly, my essential packing list when visiting Korea.

    Pocket WiFi vs. eSIM vs. International Roaming

    Like I mentioned above, you have a few options to stay connected during your trip to Seoul & Korea. Over the years I’ve done all of them, and personally I’m super impressed by how easy it was to just carry a WIFI Egg or Pocket WIFI. However, there’s pros and cons to every method, and if you want to choose the best option for you then you’ll want to compare them all.

    Seoul is known for it’s free WIFI throughout the city. Pretty much everywhere you go there’ll be at least 3 open options, and nearly every cafe or restaurant you visit will also have WIFI available for customers as well. What I’ve noticed is that sometimes connecting to these free city Wifi options can be a bit spotty, coverage goes in and out, and a lot of times you need to sign up with a Korean phone number. Plus, if you plan to travel outside of Seoul then WIFI coverage often falls short in most smaller towns and cities. If you’re only visiting major attractions within Seoul and don’t always need directions or voice calling, then I think you’ll be ok relying on the city’s free WIFI.

    My favorite thing about Pocket WIFI is that you can connect multiple devices to it. So I can have my phone connected during the day, then when I sit down at a cafe to get some work done I can connect to my private network without having to worry about joining anything sketchy. My second favorite thing about Pocket WIFI is that I can bring it anywhere and it generally gave me really fast internet. I usually go on multiple trips outside of Seoul, and my Pocket WIFI worked great no matter where I was or how close I was to a larger city. The battery life is the only downside, and last about 8 hours if kept on all day. I ended up bringing a portable charger with it in case the battery got too drained.

    My second favorite option is purchasing an eSim through sites like Airalo. You can decide how many days you’ll need coverage and it works just like your phone would back home. The only downside is your phone needs to be unlocked and support eSim use, so if you have an older phone or one that just isn’t compatible with eSIMS, this might not be an option.

    If you’re just visiting for a day or two then International Roaming is an option. I don’t usually recommend it for longer trips because depending on your provider it can get pretty expensive. In the past I used to have T-Mobile, which has excellent international roaming options that I used in multiple countries, but for some reason it would never connect in Korea. If you want to rely on International Roaming, I recommend double checking your provider’s fees and coverage in South Korea, and making sure its something that’s in your budget.

    How to Rent an LG U+ Pocket WiFi (Step by Step Guide)

    Reserving your Wifi Egg is pretty easy, and can be done online. Depending on who you decide to rent through you’ll need to enter the number of days you plan to rent it, where you plan to pick up and where you plan to drop off the Wifi Egg. I usually go through LG U+ and reserve on their website. Most companies will have pickup locations in Incheon Airport’s Arrivals Terminal and at Gimpo Airport depending on where you’re flying in from. LG U+ has two locations in the Incheon Arrivals at Terminal 1, near A & F Gates. To pick up they’ll put a hold on a credit card which gets charged when you return it. I rented the Wifi Egg for just over 30 days and because I had it for a month I only paid 55,000 Won, otherwise it’s 4,000 Won a day.

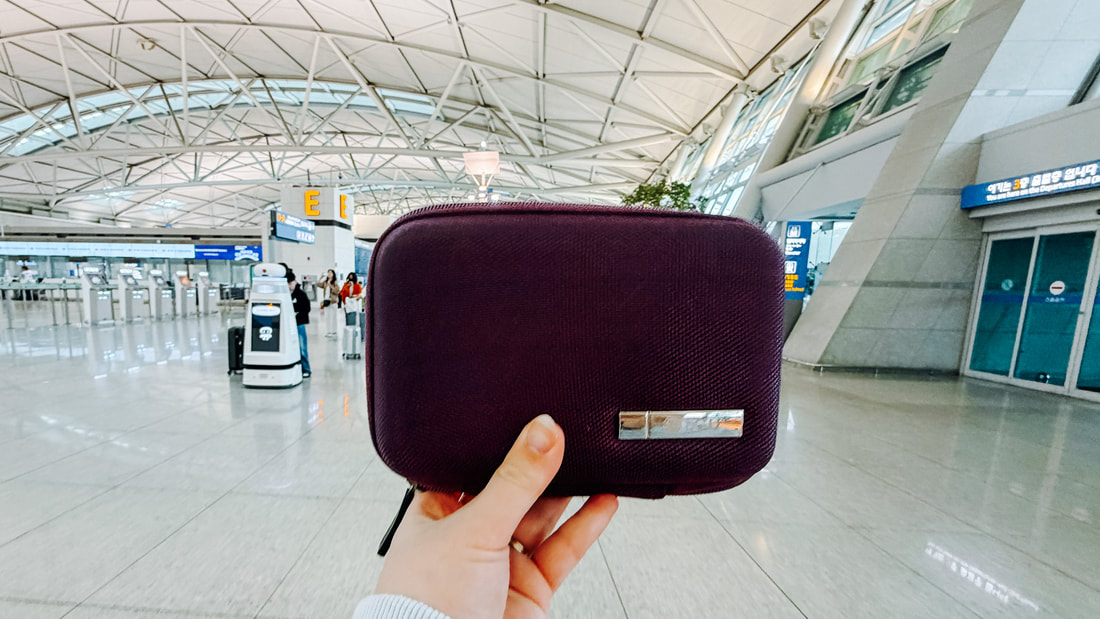
    The Wifi Egg comes in a complete set, with the usage instructions, return instructions, charging cord, and extra portable rechargeable battery inside the hard case. They do check to make sure everything is returned when you bring it back, so make sure to keep the cords in a safe place. Returning was super easy, I just dropped it off at the return desk at F Gate right before heading into the TSA checkpoint. Personally, I thought it was a super organized and easy way to stay connected for a long trip in Korea.